Difficulty: 2/10
My experience beforehand: Intermediate / Advanced-ish
Time Spent: 2-3 weeks
Supplies I Used:
- Mystery “recycled” yarn
- 4.5 mm circular knitting needles
- Darning needle
- Scissors
Pattern: Eezy-Breezy Striped Tee, a free pattern by Knit Safari

Background
Before this project, I had only knit socks so I was excited to try out a larger project. This was the perfect project to build confidence with larger works.
The pattern is great for beginners and uses some key techniques such as knitting stockinette in the round, knitting two stitches together , and slip slip knitting.
For anyone considering knitting their own clothing, these techniques are essential and this pattern is the perfect way to practice and improve your skills. The repetition in the pattern makes it super simple and the instructions are easy to follow making this the perfect pattern for anyone new to knitting.
The Process
Gauge
The Eezy-Breezy Tee pattern is approachable and works up easily, so for fun, I decided to make it harder on myself.
Whoops.
The aspects that made this pattern most difficult for me were 100% my own fault. I thought it would be fun to use the yarn I salvaged from a thrifted sweater. However, as I mentioned in the post where I talked about “recycling” that yarn, I did not know the actual weight of the yarn.
Because of this, making a gauge that matches the gauge of the pattern is essential.
The gauge for the Eezy-Breezy Striped Tee is 16 sts x 20 rows = 4 in x 4 in.
My gauge measured 16 sts x 20 rows = 2.5 in x 2.75 in… not really the same.
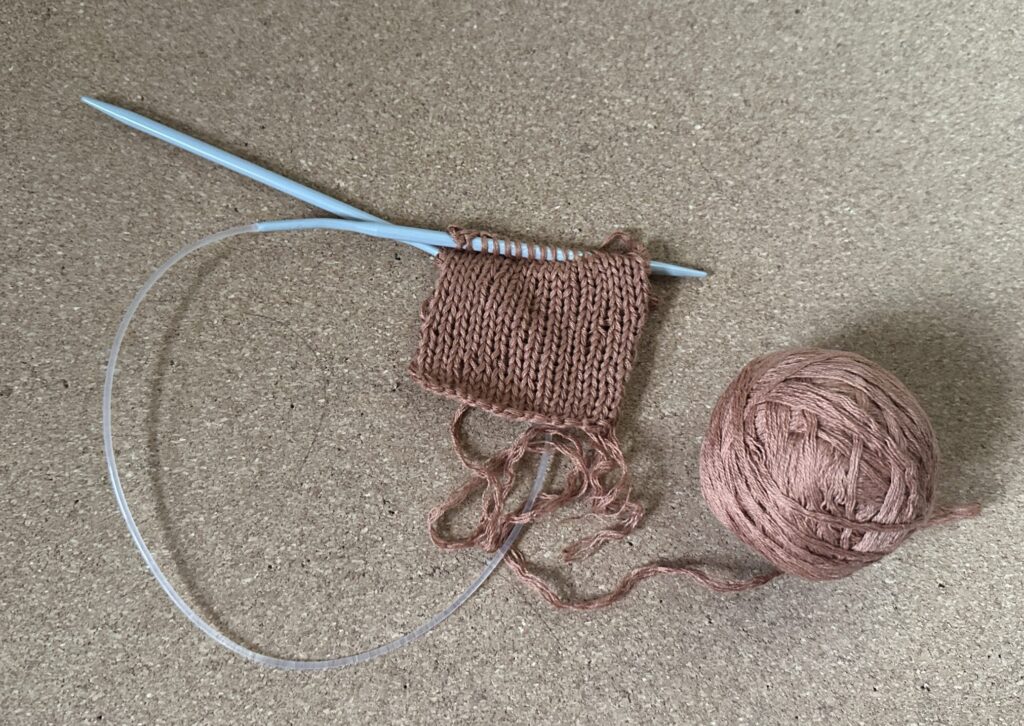
As I was already committed to using this yarn, I decided I would have to do a bit of math to figure out how many extra stitches and rows I would need to knit to get the right sizing.
Brushing off my high school math skills, I used ratios to calculate how large different parts of the pattern would be with the 4 inch gauge then used that size to determine how many rows I would need with my gauge.
For example: taking the correct gauge size, over the number of rows in the gauge and making that equal to X over the number of rows in the pattern. From there, I take the size of the gauge I made, over the number of rows knit. Then, make that equal whatever X was for the last equation, aka the intended size of the section, and put it over X to solve for how many rows I would need to knit with my gauge. From there, solve for X and that number is how many rows I need to make my section to get to the correct size.
Here’s a picture because that wasn’t confusing enough.
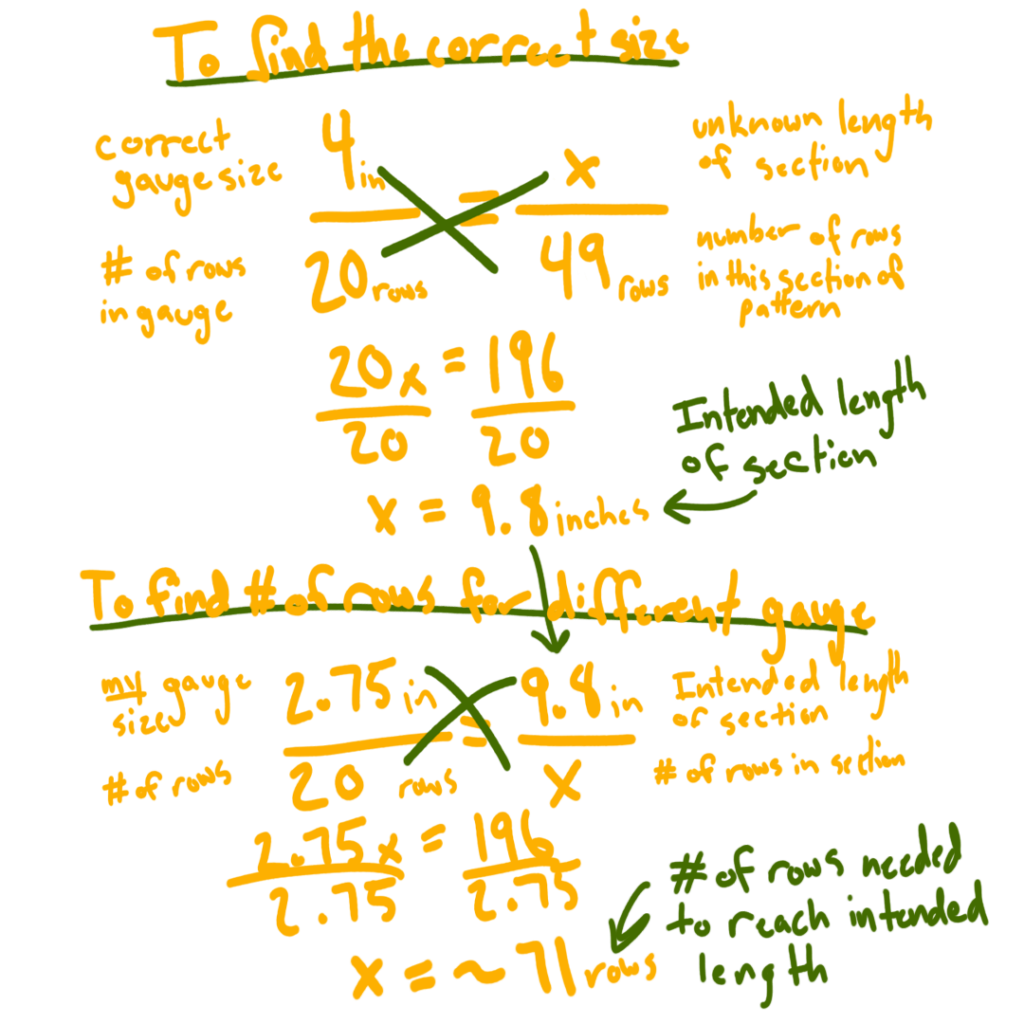
That might sound complicated but once I got into the groove of it it wasn’t too bad. However, an easy way to avoid having to do a bunch of math would be to have the correct yarn and gauge from the beginning. I just like making things difficult for myself 🙂
Knitting the Shirt
As I said before, this pattern is great for a simple project. Just listen to an audiobook or watch something on TV while knitting without having to pay much attention.
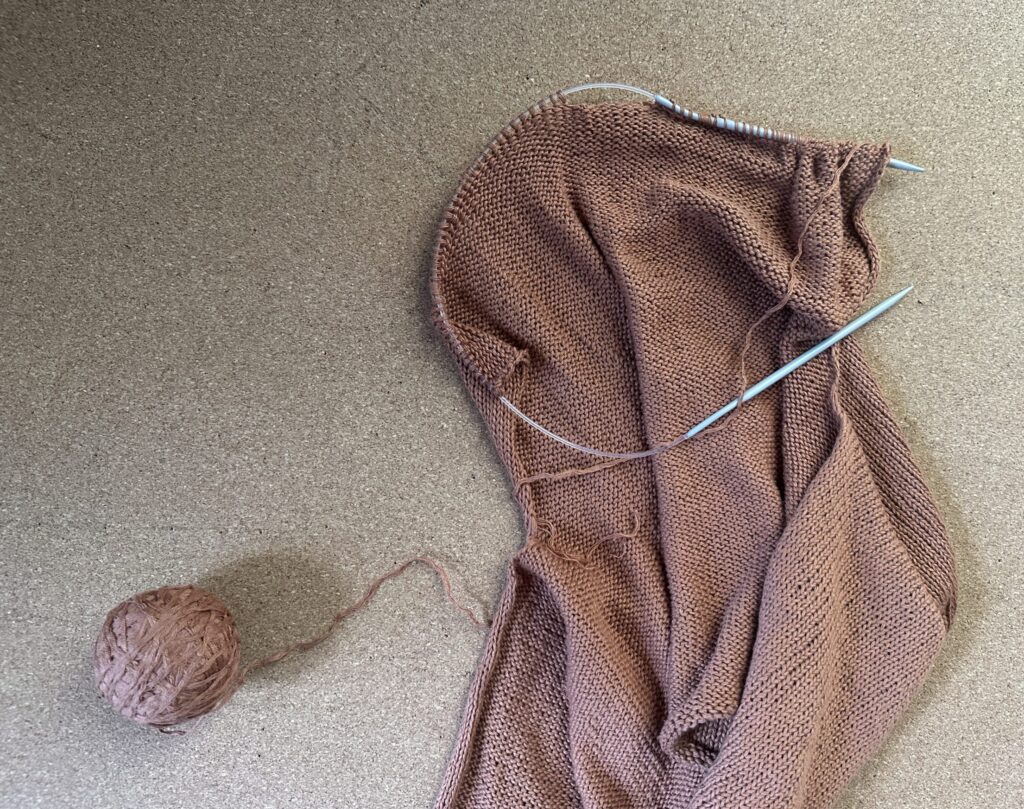
The pattern works up the body in the round first then when the arm holes begin, splits up the front and back to be worked flat separately.
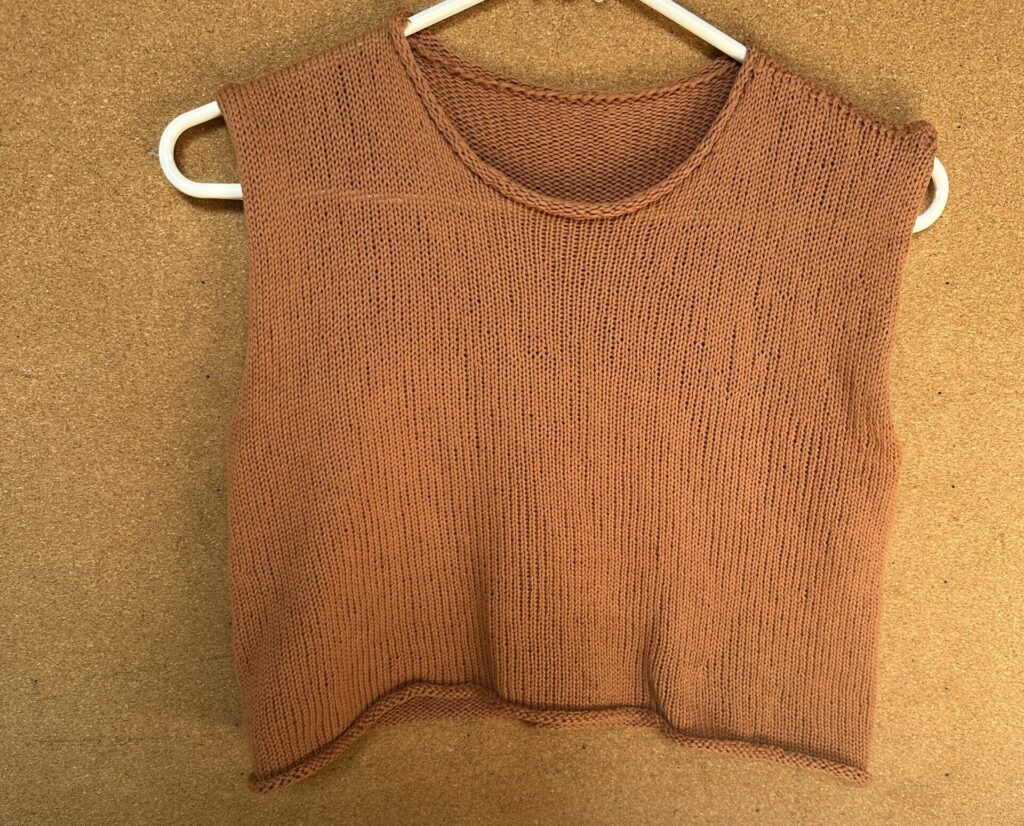
Once the body was finished, I decided to knit up the shoulders so I could try on the tee. I realized I really liked how it looked without sleeves and decided not to add any. I figure, if I decide later that I want sleeves, I could always add them.
I simply added the collar by knitting a few rounds around the neck hole and I was finished knitting!
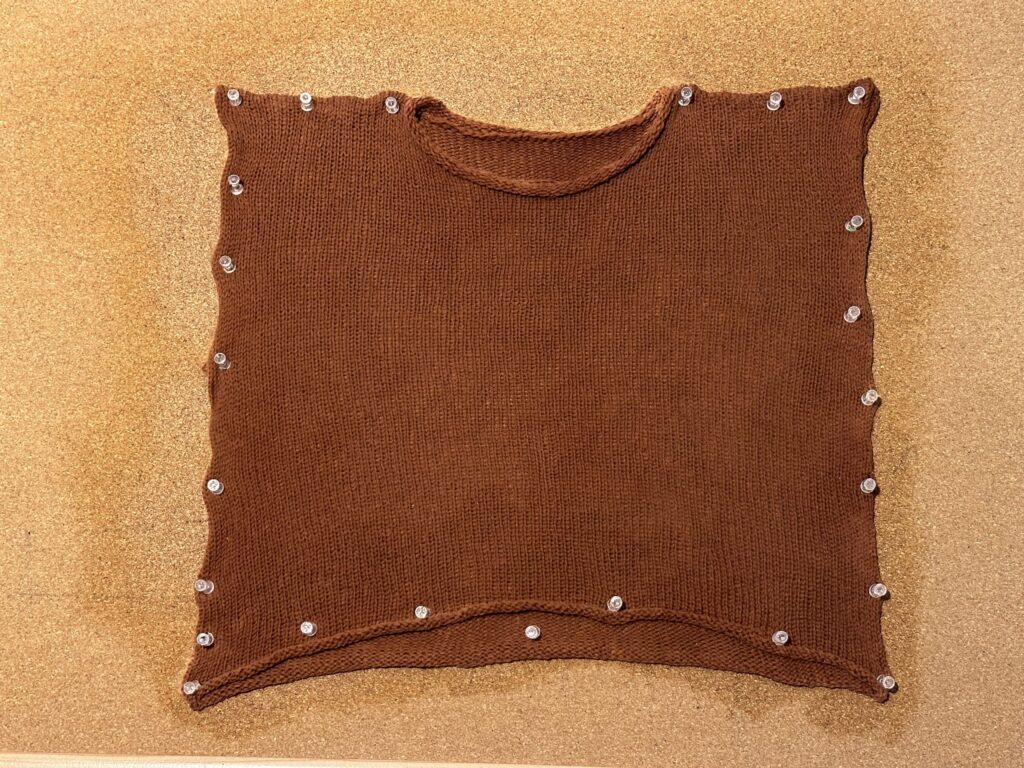
Blocking
Blocking, or essentially stretching out the project a bit so it is looser, isn’t necessary for this project and I would have been fine if I did not block it. However, because the yarn I was using was so much smaller than what the project was written for, I decided to block the shirt to give it a bit of a looser fit than what I had achieved.
Blocking was very simple for this project. Because the shirt is essentially a rectangle, I used my corkboard and used thumb tacks to stretch the shirt to the desired length. I used a spray bottle to wet the shirt and left it to dry for about 24 hours. Afterward, I was done!
Final Thoughts
The Eezy-Breezy Tee was an amazing project and I’m so glad I chose it for my first larger piece of clothing. Everything was super beginner friendly and I highly recommend this project to anyone who wants a great summer knit!